Using Flash in Wedding Photography: What You Need to Know
![]()
Let’s talk about wedding photography flash and what you need to know. Shooting with flash can be intimidating if you’re just starting out but it can be freeing the more you know how to use it. There might be times when you need to use flash and there might be times when you choose to use flash.
Before you can understand flash, you need to understand the basics of how light and shadows impact photography. Then, you can use flash to help control the light in situations where you need to or want to.
When to Use Wedding Photography Flash
Let’s talk about a few instances when you might want or need to use flash in your wedding photography.
The first and most obvious time is at night when it’s too dark for your camera to see what’s going on. Evening wedding receptions or indoor weddings often require additional lighting especially as they dim any artificial lighting in the room such as for a dance party.
Another time you might need to use flash is to combat bad light such as overhead lighting that’s creating a ton of shadows on the faces of your subjects. For example, in group pictures, if you can’t find open shade to shoot in and you’re working with mid-day sun or bad indoor lighting, then you might have to light your subjects.
Sometimes you might choose to use flash in order to isolate your subject or reduce distractions. If a scene is evenly lit you can use your flash like a spotlight to bring the focus to your subject. Or if a scene is super cluttered you can use flash to darken the distractions.
When you need flash: fill light to reduce shadows, isolating the subject, reducing distractions, or just because it’s too dark. Isolates the subject and reduces distraction.
Types of Flash Wedding Photographers Need to Know
There are a variety of types of flash that wedding photographers need to know and they have different circumstances that they work best for.
On-Camera Flash (aka Bounce Flash)
The first technique is on-camera flash. It’s just like it says where the flash is mounted on your camera. However, unlike the crude harsh flash on your iPhone, we give direction and softness to the light by bouncing it.
Therefore, let’s refer to it as “bounce flash” because we’re not just going to aim our flash at the subject and create harsh light but we’re going to bounce it off a wall or ceiling or even just a bounce card to create something a little more appealing and a little softer.

An alternative to bouncing is to use some sort of modifier such as a diffuser to make your light less harsh.
An example of when you might use bounce flash is when you’re moving around a dark room with low ceilings trying to capture well-lit pictures. Many photographers have a preference for off-camera flash which we’ll talk about next. However, there are times that you can’t utilize an off-camera flash because you’re moving too much or the ceiling is too low, therefore it’s good to remember how to fall back on your bounce flash.
Off-Camera Flash
Off-camera flash is a great choice for professional wedding photography because it creates a more interesting light and you can control it more. It’s just like it sounds, the flashes are off camera and typically mounted on something like a light stand and then placed at a flattering angle to your subject such as 45 degrees. You use a trigger attached to your camera that controls the flashes.
There are various strategies for off-camera. The most basic is one of my favorites because it’s quick and agile which works well with my shooting style. It’s called stick lighting and it’s basically putting the flash on a stick (lightweight light stand) and aiming it from the direction you want your light to come from, of course this means you might need someone to hold the stick.

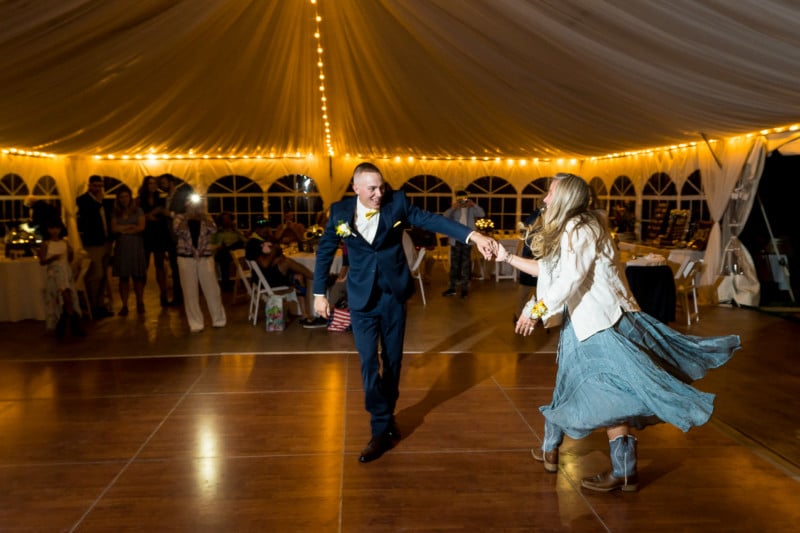
Since I work with my husband we can often quickly hold a stick light for each other if there’s a dramatic shot we want to create where we are spotlighting the subject. Or sometimes we use it for quick transitions between speeches, cake cutting, and dances. We might have a four-light setup for the dance floor but the cake is over in the corner so we need to quickly be able to light it.
I also use an off-camera flash set-up for getting ready shots when I want to isolate my subject — it’s the same idea as stick lighting except I have to mount the flash somewhere because I don’t have someone to hold it or space for someone to hold it.
![]()
Another common off-camera flash technique is using a 2, 3, or 4 flash set-up on a dance floor. This allows you to move around the dance floor but have your subjects lit in an interesting way.
Other Fun Flash Techniques
There are a few other fun flash techniques I’ll mention because they’re fun to play with when creating beautiful images.
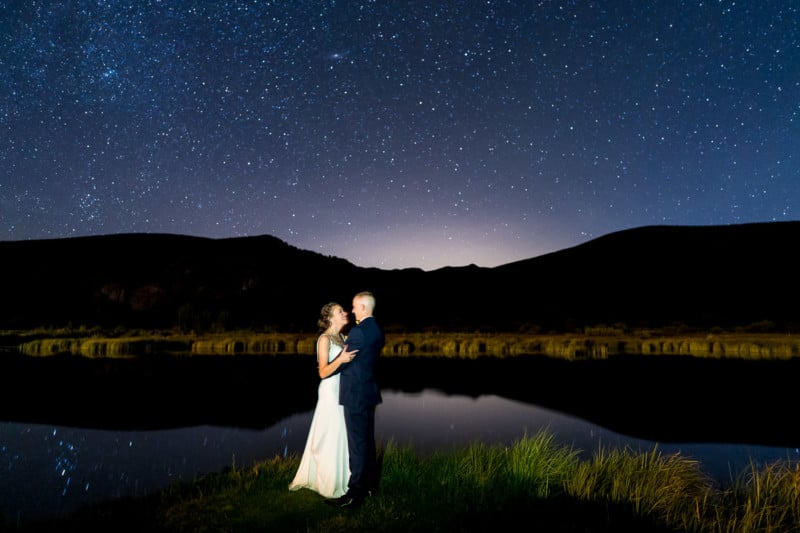
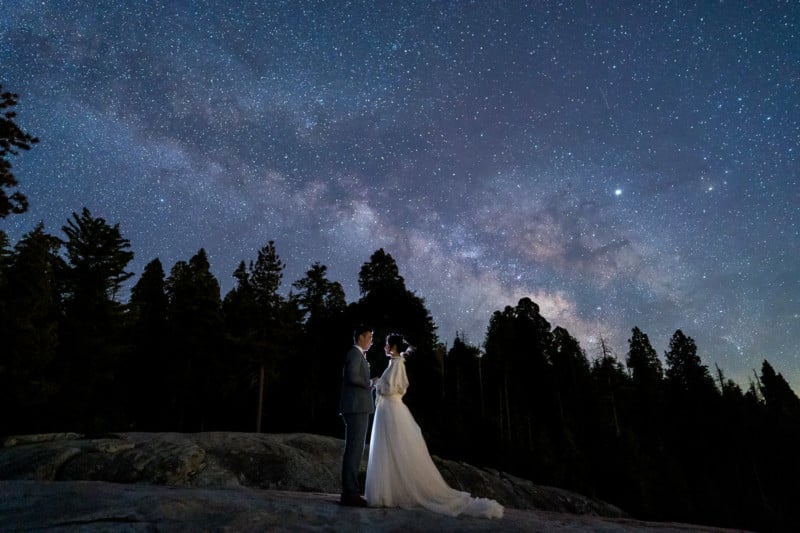
The first is backlighting your subject, sometimes you want to add some rim light to separate your subject from the background so you’ll place a flash behind them.

Another technique for separating the subject from the background, or lack thereof, is lighting the background such as a cool wall. You might allow the subject to be a silhouette in that case.
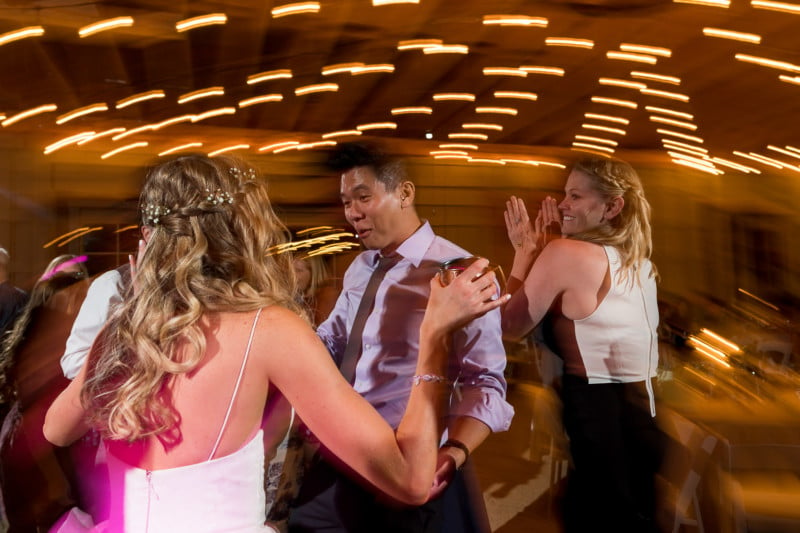
Dragging the shutter in order to get some ambient light or for creating playful dance party effects can be really fun too. It works best if there is a constant light source such as twinkle lights that you’re going to expose for while lighting your subject.

Wedding Photography Flash Gear
The main upside of using flash in your wedding photography is that you can create more dynamic, interesting, and professional images. None of the guests or uncles with their iPhones are creating the quality of work you are. It also allows you to shoot in less than ideal lighting conditions and still create great work.
It’s also important to know when not to use your flash, don’t let it get in the way of getting the best shot which is sometimes the simple shot.
The worst part of using flash in your wedding photography is that it significantly expands your gear list. My camera, lenses, and batteries can fit in a backpack that I can take anywhere. But you add all the lighting gear and suddenly I’m not as mobile.
Therefore it’s good to keep your gear list for the majority of the day simple and then have a reception bag for those hard-to-light evening receptions. Below is a sample flash gear list to give you an idea of what we use. We’re fairly minimalistic and yet it’s a pretty long list.
Wedding Photography Flash Sample Gear List
- Godox AD200 x4. Used to light receptions and portraits
- Godox V860II. Used for bounce flash and to light night portraits
- Godox X-Pro-S trigger. Can fire the AD200s or the V860s
- All flashes have MagMods with grids, can also easily add a gel (½ CTO gel)
- Lume Cube. Good for night shots where constant light is easier for hard-to-focus environments such as a sparkler exit – built-in gels and grid are nice
- Godox AD-B2 dual flash holder. For when you need the power of 2 AD200 such as lighting something in the middle of the day when you have to overpower the sun
- Light stands. 2 shorty 8-foot Travel stands and 4 12-foot stands with sandbags for traditional dance floors as well as some clamps and suction cups for getting ready rooms
- Have a reflector but rarely use it
Wedding Photography Flash Summary
In summary, it’s important to know not only when to use flash in your wedding photography but also what techniques to utilize. Using flash can make your photos more dynamic and make it possible to shoot in hard-to-light situations. However, using flash can slow you down and cause you to miss the shot.
My suggestion is to start simple, master one technique at a time, and find the right time in the day to play and experiment. Hint: it’s probably not the ceremony.
As part of a husband-and-wife team, I work with my partner to identify times that each of us gets to play and experiment as one of the benefits of working with your spouse in photography. If that’s not in the cards for you then practice at home, we once set up reception lighting and took dance pictures of our dog when we were trying out a new system.
About the author: Brenda Bergreen is a Colorado wedding photographer, videographer, yoga teacher, and writer who works alongside her husband at Bergreen Photography. With their mission and mantra “love. adventurously.” they are dedicated to telling adventurous stories in beautiful places.